Submitted by The Fan Club on

This guide is based on various community forum posts.
This guide is intended as a relatively easy step by step guide to:
- Install LogMeIn Hamachi secure VPN client to create a private network.
- Install Haguichi GUI frontend to configure Hamachi.
- Create a new VPN and connect clients to your private network.
- Login via SSH to remote computer.
- Browse shared folders on the network of all connected computers.
- Create a remote desktop connection and login to computer remotely.
Requirements:
- Ubuntu 12.04 or later installed machine to act as local machine and one to act as remote - the remote computer can also be Windows or Mac OSX based as long as you install the relevant Hamachi client on these machines, but that falls outside the scope of this guide.
1. Install LogMeIn Hamachi2 secure VPN client.
- On each computer you want to be part of your virtual network requires a LogMeIn Hamachi client to be installed.
- Visit the LogMeIn Hamachi Linux Download page and select the correct .DEB version for your 32bit or 64bit version of Ubuntu.
- To download the 32bit version click on the download link and install with the Ubuntu Software Center, or open a Terminal Window and enter :
sudo apt-get install lsb-core ncurses-term pax
cd /tmp
sudo wget https://secure.logmein.com/labs/logmein-hamachi_2.1.0.119-1_i386.deb
sudo chmod +x logmein-hamachi_2.1.0.119-1_i386.deb
sudo dpkg -i logmein-hamachi_2.1.0.119-1_i386.deb
sudo rm logmein-hamachi_2.1.0.119-1_i386.deb- To download the 64bit version click on the download link and install with the Ubuntu Software Center, or open a Terminal Window and enter :
sudo apt-get install lib32z1 lsb-core ncurses-term pax
cd /tmp
sudo wget https://secure.logmein.com/labs/logmein-hamachi_2.1.0.119-1_amd64.deb
sudo chmod +x logmein-hamachi_2.1.0.119-1_amd64.deb
sudo dpkg -i logmein-hamachi_2.1.0.119-1_amd64.deb
sudo rm logmein-hamachi_2.1.0.119-1_amd64.deb
- Tip: Ubuntu 12.10 users note that lsb has a slight Python version issue and causes many errors during install of certain software like LogMeIn Hamachi. This can be fixed by adding the following to the top of the /usr/lib/lsb/initdutils.py file and re-installing LogMeIn Hamachi :
#!/usr/bin/python2. Install Haguichi GUI for Hamachi.
- Install the excelent Haguichi graphical frontend for Hamachi client to configure Hamachi.
- Add the PPA to your software sources. Open the Terminal Window and enter :
sudo add-apt-repository ppa:webupd8team/haguichi && sudo apt-get update
- Then search for and install haguichi from your Ubuntu software center or open the Terminal Window and enter :
sudo apt-get install haguichi haguichi-appindicator- Reboot the computer to complete the install.
3. Use Haguichi to create a VPN and add computers to a network.
- Haguichi's application indicator integrates perfectly with Unity desktop. Here you will be able to do the important tasks required to set things up.

- Once you launch the main window of Haguichi for the first time you will be prompted to allow Haguichi to configure Hamachi.
- Allow Haguichi to do the basic configuration of Hamachi and follow the instructions.
- Once you have selected a nickname for your computer, you will be able to Connect to Hamachi.
- Once connected you can right-click on the Haguichi window and Create or Join a VPN Network.
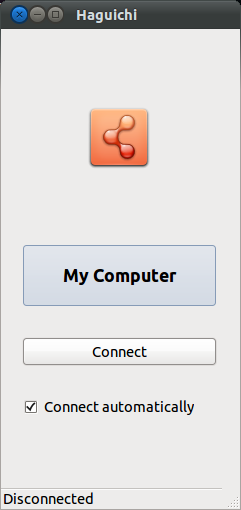

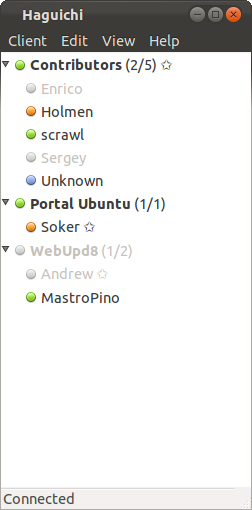
4. Browse Shared Folders, view Remote Desktop, SSH and Webmin with Haguichi.
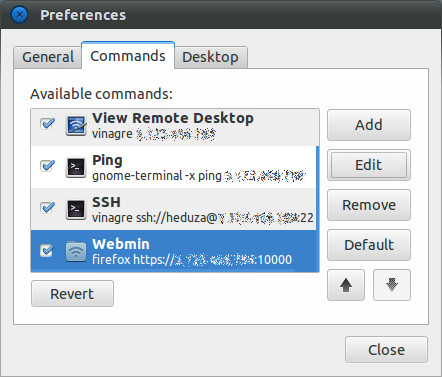
- If you right click on a computer on your network you will be able to select one of the following options: Browse shares, View remote desktop and Ping. The SSH option we will add.
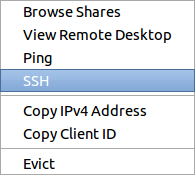
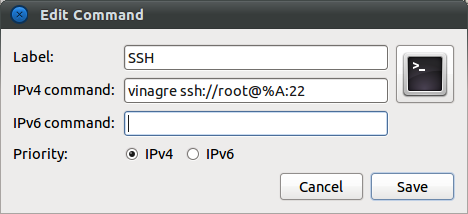
- To add the SSH option as shown above, simply click on the Edit > Preferences in Haguichi's main menu.
- Then click on the Add button.
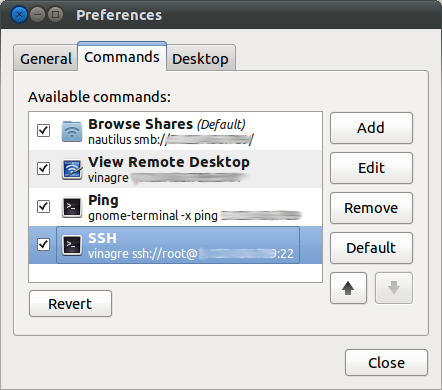
- Simply enter following line in the IPv4 command box, changing the username root to your ssh user. The standard SSH port number is also added at the end with :22, and should be changed as required, or can be left out.
vinagre ssh://root@%A:22
- To add the Webmin option as shown above, simply click on the Edit > Preferences in Haguichi's main menu.
- Then click on the Add button.
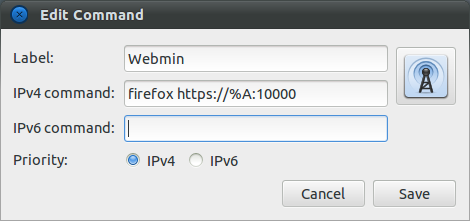
- Simply enter following line in the IPv4 command box, The standard Webmin port number is also added at the end with :10000, and should be changed as required.
firefox https://%A:10000


Comments
Thank you for this guide, I
Submitted by Goshen (not verified) on
I did not encounter this
Submitted by The Fan Club on
This is what I did to fix it.
Submitted by Goshen (not verified) on
Awesome blog! Is your theme
Submitted by advertiserslist... (not verified) on
Thank you. The theme is
Submitted by The Fan Club on